Intro
- Component들끼리 데이터를 주고 받을 수 있는 방법을 정리해 보자!
Component Animation Functions (10가지)
| Function Name |
Description |
trigger() |
애니메이션을 시작하고 다른 애니메이션 함수의 컨테이너 역활 |
style() |
CSS 스타일을 연결해줌 |
state() |
각 transition에 CSS style들을 할당해줌 |
animate() |
Transition이 일어날 타이밍 |
trasition() |
두개의 states가 어떤 움직임을 구사할지 할당해줌 |
keyframes() |
정 |
group() |
|
query() |
|
sequence() |
|
stagger() |
|
코드 예시
Goal: Input()과 Output() Interaction를 만들어 보자! (Services랑 Routes는 나중에!)
(저번에 만든 component 사용하자!)
Step 1:
1
2
3
4
5
6
7
8
9
10
11
| import { Component } from '@angular/core';
@Component({
selector: 'app-root',
templateUrl: './app.component.html',
styleUrls: ['./app.component.css']
})
export class AppComponent {
title = 'componentDemo';
public data = 'Give this string to your child!'
}
|
- App ts파일을 연다 (src > app > app.component.ts)
Step 2:
1
| <app-my-first-component [gift]="data"></app-my-first-component>
|
- App의 html 파일을 연다 (src > app > app.component.html)
Step 3:
1
2
3
4
5
6
7
8
9
10
11
12
13
14
15
16
17
| import { Component, Input, OnInit } from '@angular/core';
@Component({
selector: 'app-my-first-component',
templateUrl: './my-first-component.component.html',
styleUrls: ['./my-first-component.component.css']
})
export class MyFirstComponentComponent implements OnInit {
@Input() public gift = "";
constructor() { }
ngOnInit(): void {
}
}
|
- Component의 ts 파일을 연다 (src > app > my-first-component > my-first-component.component.ts)
Step 4:
1
| <p>My gift from parent </p>
|
- Component의 html 파일을 연다 (src > app > my-first-component > my-first-component.component.html)
Result
1
| My gift from parent Give this string to your child!
|
- Terminal에서
ng serve를 이용하여 브라우저에서 결과를 확인한다.
- 만약 위의 문장이 보인다면 성공!
@Output (Child -> Parenet)
Step 1:
1
2
3
4
5
6
7
8
9
10
11
12
13
14
15
16
17
18
19
20
| import { Component, EventEmitter, OnInit, Output } from '@angular/core';
@Component({
selector: 'app-my-first-component',
templateUrl: './my-first-component.component.html',
styleUrls: ['./my-first-component.component.css']
})
export class MyFirstComponentComponent implements OnInit {
@Output() childEvent=new EventEmitter<string>();
constructor() { }
ngOnInit(): void {
}
onPressed() {
this.childEvent.emit("A letter from child")
}
}
|
- Component의 ts 파일을 연다 (src > app > my-first-component > my-first-component.component.ts)
Step 2:
1
| <button (click)="onPressed()"> Click Me! </button>
|
- Component의 html 파일을 연다 (src > app > my-first-component > my-first-component.component.html)
- 위의 코드를 html 파일에 넣는다.
Step 3:
1
2
3
4
5
6
7
8
9
10
11
| import { Component } from '@angular/core';
@Component({
selector: 'app-root',
templateUrl: './app.component.html',
styleUrls: ['./app.component.css']
})
export class AppComponent {
title = 'componentDemo';
public letter = ''
}
|
- App ts파일을 연다 (src > app > app.component.ts)
Step 4:
1
| <input type="button" value="Click Me" (click)="onClick()"/>
|
- App html를 연다 (src > app > app.component.html)
Result
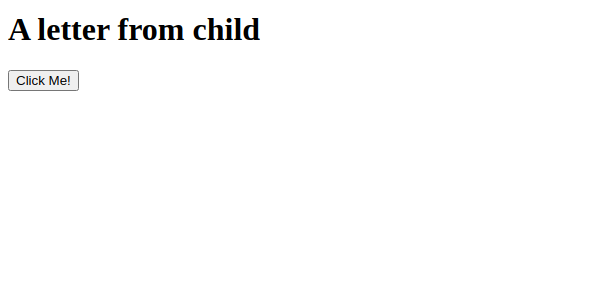
- Terminal에서
ng serve를 이용하여 브라우저에서 결과를 확인한다.
- 만약 Click Me 버튼을 누렀을 때 “A letter from child”라고 뜬다면 성공!