Intro
- Custom Directives 만들기
코드 예시
Goal: Custom Directive를 만들어 보자! 준비물: 새 프로젝트와 Component 하나
[ngClass]
Step 1: Open Terminal
terminal
1
2
3
4
5
# inside of your project folder
mkdir src/app/directives
cd src/app/directives
# ng generate directive <custom_directive_name>
ng generate directive custom
- directives라는 폴더를 만든다
- directives라는 폴더 안에 custom 이라는 directive를 만든다
Step 2: Custom directive 만들기
src > app > directives > custom.directive.ts
1
2
3
4
5
6
7
8
9
10
11
12
13
14
15
16
17
18
19
import { Directive, ElementRef, HostListener } from '@angular/core';

@Directive({
  selector: '[appCustom]'
})
export class CustomDirective {

  constructor(private elementRef: ElementRef) { }

  @HostListener('mouseenter')onMouseEnter() {
    this.elementRef.nativeElement.style.fontSize='23px'
    this.elementRef.nativeElement.style.backgroundColor="orange";
  }

  @HostListener('mouseleave')onMouseLeave() {
    this.elementRef.nativeElement.style.fontSize='initial'
    this.elementRef.nativeElement.style.backgroundColor="initial";
  }
}
- ElementRef와 HostListener를 import한다
- 마우스가 해당 element 위에 호버하면 style를 바꾸는 ‘onMouseEnter’과 ‘마우스가 해당 element 위에서 떠나면 style를 원래대로 바꿔주는 ‘onMouseLeave’를 만들어 준다.
Step 3: App Module에 Custom Directive Import 하기
src > app > app.module.ts
1
2
3
4
5
6
7
8
9
10
11
12
13
14
15
16
17
18
19
20
21
22
23
24
25
import { NgModule } from '@angular/core';
import { FormsModule } from '@angular/forms';
import { BrowserModule } from '@angular/platform-browser';

import { AppRoutingModule } from './app-routing.module';
import { AppComponent } from './app.component';
import { MyFirstComponentComponent } from './my-first-component/my-first-component.component';
import { CustomDirective } from './directives/custom.directive';

@NgModule({
  declarations: [
    AppComponent,
    MyFirstComponentComponent,
    CustomDirective
  ],
  imports: [
    BrowserModule,
    AppRoutingModule,
    FormsModule
  ],
  providers: [],
  bootstrap: [AppComponent]
})
export class AppModule { }
- App Module에서 CustomDirective를 임포트 한다
- App Moudle의 ‘declarations에 CustomDirective를 포함하다.
Step 4: App component에 List만들기
src > app > app.component.ts
1
2
3
4
5
6
7
8
9
10
11
12
13
import { Component } from '@angular/core';

@Component({
  selector: 'app-root',
  templateUrl: './app.component.html',
  styleUrls: ['./app.component.css']
})
export class AppComponent {

  languages: any[] = [
    "Python", "Java", "JavaScript", "TypeScript"
  ]
}
- Html에 보여 줄 리스트 하나를 만든다
Step 5: App html에 custom directive 사용하기
src > app > app.component.html
1
2
3
<ul *ngFor="let lang of languages" appCustom>
    <li>Programming Language: </li>
</ul>
- ngFor를 이용하여 Languages 리스트에 있는 아이템들을 html에 그린다
- 아까 custom.directive.ts에서 보았던 seletor tag를 ul tag 뒤에 써준다
Result
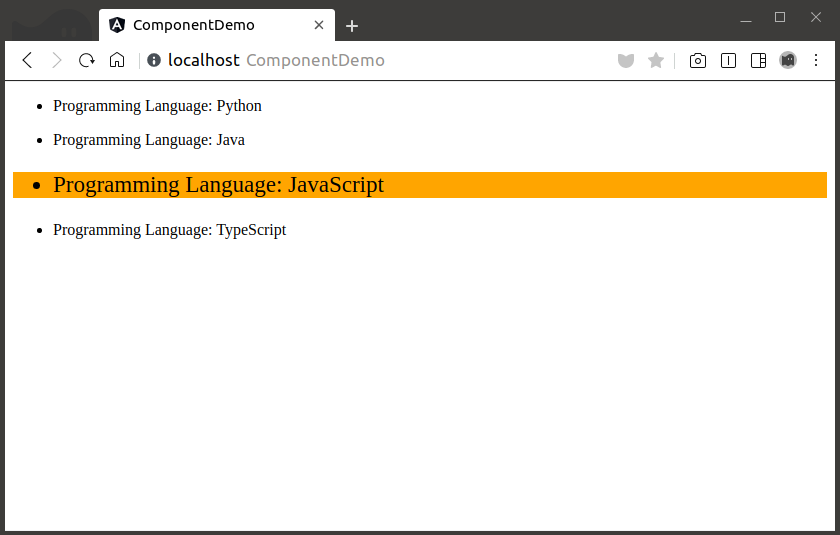
- Terminal에서
ng serve를 이용하여 브라우저에서 결과를 확인한다.